Tuesday, November 23, 2010

More cameras

We'll I was away for my Grandads funeral a few weeks ago and Dad said "here we found this and thought you might like it". It was a 1933 Six-20 Target Hawkeye Box camera. It takes 620 film which is hard/expensive to get these days, and I have no idea if anyone around here processes them.
Then I got to Gizzy and Dad says "here I've got this one too.." and pulls out a Brownie Starlet which looks really cool. Dad was looking it up online and I said it will be from the 1950's in has that 50's look about it. After dads awesome online searching skills of not being able to find the camera for quite sometime, we discovered it was infact made in 1956. It takes 127 film and has 4x4cm images. 127 is not too hard to get and developing only is reasonably priced so I may have to try this one out. It's such a styley, little thing and would be fun to play with. I might even try some 35mm film modifications...that could be interesting.

I've taken about a 3rd of the roll on my Holga at the moment. Cant wait to see the results!

Wednesday, October 6, 2010

Lomography for real!

Well the other day I was looking through the fashion mag that comes weekly with the newspaper, and I noticed that a shop was selling replica Lomography cameras. I was like hey cool and went to inspect the website and to look up lomo cameras as I didn't realise you could get them these days. Anyway I couldn't believe it when I saw the 'Diana' lomo camera..I used to play with one when I was little! It was just hanging out in the toy box so was considered a toy. The top is pale green, the bottom half black with a rough texture. I remember this little red round thing on the back at the bottom, i'm not sure what it is exactly but I remember I used to press it like it was a button. I remember its little metal switch/s(?) too.

But as for that camera, who knows where it is these days. Is it still at Dad's place in amongst the toys or was it thrown away at some stage? I have no idea.

Originals like that are a lot more expensive to buy than the replicas. And also have the misfortune of taking a 120 film. So buying another one of those (or even finding and using the old one) was out of the question as it would be too expensive to use.
Luckily I discovered some that take a 35mm film. They look a bit different to the originals but in the long run would be cheaper. Cheap to buy and cheap to use (or as cheap as a film camera can be anyway).


So...in the end I decided to buy a 'Holga' which isn't the same as the old one but the picture seems to be a bit more to my liking. I've heard they are more sturdy than Dianes too. Now all I have to do is wait for it to arrive! It's going to be weird using a film camera again! I know I've only had digitals since 2005..so 5 years of my 18 odd years of owning cameras...but I'm really gonna have to get used to using film again! No playback...who knows what you will get? But that was the exciting thing about using film! I loved the surprise of getting the photos back... And the thing about Lomography is it's creative and arty so doesn't have to be perfect.

Cant wait!

Saturday, September 25, 2010

Wedding Photography

Well I've been a bit slack over the winter (although I do have a few things I'll have to put up at some stage), but now it's spring and it's time to get back into it.
Yesterday I went to an afternoon course on wedding photography. There were 19 other girls on the course plus a 4 models (a fake bride and groom for single shots, and a bride and groom that were actually a married couple for the couple shots)

We learnt a lot about using the light available inside and outside so you don't have to use a flash. I didn't really know anything about using light to begin with so it was good. We also learnt about posing people so they look natural, and also to get rid of unwanted features like fat bulges and unwanted shadows.

The people taking the course were from Perspectives Photography. They're the company who take amazing photos of brides 'trashing' their wedding dress (eg: swimming in it in a river, rolling in the sand etc).

www.perspectivesphotography.co.nz

So here are a few of the photos I took...


Wednesday, June 23, 2010

More Lomo

I was having so much fun using my new learnt technique on photos and tried out some other ideas I thought might look good...


Here's Ferndus and Mini with Lomo style applied plus Black and White. It makes the feeling of the image quite dramatic.


Taken at Steve's army training also Lomo style with an emerald filter added which also gives a sense of drama rather than the fact that the uni mog was just towing the gun back to base.


And one more shot of Natalie I took with only lomo applied which worked nicely. I think it's my favourite photo in this style.


Heres the Original....

Tuesday, June 22, 2010

Old School


I was looking through a website of New Zealand photography and I was wondering what filters or settings (or film if that's the case)that is used for some styles of the photos that were on there. Its a look that you see around sometimes especially in fashion magazines or those odd mags where people are just lying around and doing weird things (arty types of mags I think, anyway I don't understand them).
So I typed into Google 'how do you make photos look old' and the first thing that came up was the technique I was looking for. Although it wasn't a photography technique at all...
Actually it started off with a cheap Russian made camera called a Lomo. It would take photos that looked a bit different (especially when the film was developed in the wrong chemical). It was a bit of a craze to do this in the 90's.
Apart from using one of those cameras the effect can be created by using (you guessed it!) Photoshop. Yay! And it's really easy too.

Here's the tutorial I followed....

http://digital-photography-school.com/how-to-make-digital-photos-look-like-lomo-photograph

And here's some examples of the technique...


This was my first attempt using a picture I took while taking photos for the 2010 Auckland Photography competition a few weeks ago...


This is a photo Mel took of Natalie which I experimented on...


Here's a mushroom I took when I was at the Arboretum...


I still need some more practice with my own settings so the photos aren't too bright or whatever the case may be. I reckon a warming filter would give it an older look...

Sunday, May 2, 2010

My new Polarising Filter

I finally decided on which filter to get and bought one on Ebay. I decided to go for the Kenko Pro 1 DMC circular polarising filter. I did some tests with and without the filter...

This is the photo without the filter, the settings are at F/5, 1/800 and ISO 400.


This is the photo with the filter. The settings are the same.


The sky is still a bit bright but there was quite a lot of cloud cover.
Here are some examples using the polarising filter with only a few clouds...

Its tricky finding the right combination, I'm going to need more practice at it. This one the building is all right but the cloud is a bit bright. The settings were f/3.5, 1/1000 and ISO 400.


This one the sky is good but the landscape below is a bit dark. Settings: F/8, 1/320 and ISO 200.

Friday, April 9, 2010

The confusing task of spot metering...

I always see people talking about 'metering' in articles. I knew that there were four metering settings on my camera (evaluative, spot, partial and centre weight)but I just usually leave it on evaluative which is the 'auto' setting. Generally metering is the way to find the best exposure but the evaluative one doesn't always find it.
I had a read various articles about the other types of metering and decided that spot metering looked quite handy for certain situations such as those where the subject is dark in a back-lit situation. At first I thought it was going to be simple: spot meter on most important part of the subject to take the exposure, press the auto exposure lock (AEL) to keep that exposure, recompose and take the shot with the stored exposure. If the exposure isn't right do the above again, but take the reading of the exposure from a different source.
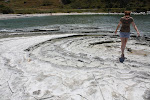
So I headed outside with Massimo the cat so replicate the scene used in one of the articles I read...two kids, backs to the sun, kids came out too dark, he took a reading off one of the kids faces, took the photo again and wallah! The photo was perfect.
Unfortunately it didn't seem to want to work for me...


This first picture of Massimo was taken using the 'auto' evaluative meter. Looks pretty good, not too over or under exposed in full sunlight.


Then I moved around into a spot where it was shady but the sun was back-lighting the picture. I tried the same thing and it did this (above) and it also did the same for spot metering off anything that gave a reading of more than 1/640. The aperture was f8 and ISO was 400 for all the pictures.


For readings around 1/500 or less this is what it looked like. Massimo is fine but the background is way too overexposed.

I tried adjusting the exposure compensation and still nothing.


So how do you get a picture of a subject that is at the right exposure with the background good too? Hmm... looks like I might need to do a bit more research on that.

Next I went into a fully shaded area. The aperture was still f8 and the ISO was still 400. I took a photo of a flower...


The initial picture was taken with a reading from the flower of 1/125. That was slightly dark. I looked at the histogram and the peak was to the left indicating that it was under exposed(the peak should be in the middle).


This one was taken with a reading from one of the light green flower pods and was 1/500. It too was underexposed with the histogram showing even more to the left.


The next was taken from a different part of the garden from a darker spot which was metered at 1/40. It came out relatively well and the histogram says that the peak is slightly to the left but nearer the middle. It looks almost overexposed to me though.


And the final one was metered at 1/8 and was taken from the dark dirt. It is way too overexposed and the histogram is off the richter scale over to the right.

SO..what have we learnt? Readings off LIGHT things = a darker picture and readings off DARK things = a lighter picture. In other words a higher reading eg: 1/500 = a darker picture and vice versa. SO you have to find the average.

Or just use the evaluative meter.

Some sites about metering...
Spot metering used in different shots
A detailed description on spot metering
Exposure
Using a grey card to get a reading
Metering modes

Friday, April 2, 2010

New lens

Well here I am at long last, after the difficult task of choosing a zoom lens.
I spent at least 3 WHOLE days researching and talking to people on the Canon forum after narrowing my preferred lens choices down to 2. At first I was sure I was going to go for the 70-200 F4 USM "L" lens, but then I changed my mind to the 70-300mm IS, then I changed it back, then someone threw in another possibility (the 55-250mm IS) and the evidence for that being a better lens than the 70-300, so I did more research and changed my mind between them a few more times and finally decided that I would go into Camera & Camera to have a look at all three.
So I went in there and had a look. The guy that served me in the shop was really helpful and his recommendation was that I get the 55-250mm as in his opinion it was just as good as the other two but less than half the price. So in the end I bought it.
Which is good because now I have more money to spend on other things like filters and a new camera bag.

Saturday, March 27, 2010

Hot air - part two

Well here I am back from the Hot Air Balloon festival in Hamilton "Balloons over Waikato" where I learnt a few things about taking photos at night, and of air balloons.

Here's what I learnt from this experience:

1. I majorly need to get a zoom lens. There was little I could do with my 18-55mm. I have two in mind that I'm trying to decide between but which one??
2. Expect the unexpected-and don't expect something to be a certain way...I was expecting to be able to get close to the balloons at the night glow, but there were barriers up and it was impossible to get close to them as there were so many people.
3. Just because someone has used a particular shutter speed and aperture in a photo or the rules say so, doesn't mean it's going to work... I had a list of settings to try but I didn't have much luck. keep fiddling around and if you find a good setting DON'T change it to another and then forget what the other one was!!
4. I need to study up more and practice night time photography. I had studied up a lot on night time photography of lights but I think I need to do a bit more research on the topic. I also need to study up on what to do if it's a foggy morning...
5. A tripod is probably a good idea (if possible).
6. And DON'T EVER take someone with you that is stressed about an assignment they haven't finished. You'll never hear the end of it.


Right, now for the photo's...


Balloons at night-Brightened up a bit in RAW


Balloons alight


A foggy morning by the lake...balloons were being set up behind me...(HDR)


Launching...


Jack in a box...up up and away!
f10 1/40 ISO 320


Let loose...


Spectators watching a bright balloon launching
(HDR tone-mapped with slight desaturation)


Inside the green and pink balloon before launch

Thursday, March 25, 2010

Hot air...

Well, I have been invited to an interesting event tomorrow night... An air balloon festival! So that will be fun to try out some nighttime photography and the following morning they're off again, so we'll be getting up early to see them. So how do I photograph air balloons? Especially the ones at night? Time to google...

Outdoor night scenes usually include large areas of darkness broken by smaller areas of light from buildings, signs, and streetlights. Pictures of outdoor scenes are quite easy to make because good results are obtainable over a wide range of exposures. Using short exposures emphasizes well-lit areas by preserving the highlight detail, while the shadow areas are dark because of underexposure. Long exposures help retain the detail of the dark areas, while highlight detail is lost because of overexposure.


Therefore: A wide range of exposures can be used.
Short exposures = detail in light areas
Long exposures = detail in dark areas

If you do not have an exposure meter or cannot get a good reading, bracket your exposure.
Focus carefully; depth of field is shallow at the wide apertures required for existing light photography.


So...Use AEB (1/2-2 stops)to retain detail in less bright areas.
Wide apertures are required for night photography with existing light (eg: lots of lighted up air balloons)and of course depth of field will be shallow.


I have a handful of apertures and shutter speed combos to try based on various photographs of lights at night by other photographers so I will just try to experiment.

Wish me luck and hopefully I'll be back here on Sunday with some good photos!

Flash o_0

Yesterday I got my new Flash :) It was a lot bigger then I expected and looks a bit top heavy on my camera! The batteries have been charging all night and half the day and now all I have to do is learn how to use it...
I know my camera settings pretty much off by heart now but that took a while for it to all be ingrained into my memory. So..now it's time to get my head around the Flash. At least the manual isn't too long, but even then there's still a lot more I will need to learn from books or the internet. I'm still learning things about my camera too.
Here is a good site I found on the Canon users photography forum which I will be reading in the next few days...
http://photonotes.org/articles/eos-flash/

Until next time.....

Sunday, March 21, 2010

Macro Photography

Yesterday I decided to have a practice with my macro lens outside in the garden. Here are some of the shots I took...


Saturday, March 20, 2010

No Night Photography Tonight

OK, so that idea will have to wait a bit. I found out that my camera can only take exposures of up to 30 seconds unless I set it to BULB and hold down the shutter button (which would not be good for minutes or hours). SO, I will need to get a shutter lock mechanism. Apparently someone put masking tape across there button and produced quite a good photo, but an easier way is to buy a shutter release remote. Then I can release the shutter, go away and come back 5 minutes later or whatever and stop the exposure. Knock offs on Trade me which are exactly the same as the Canon product seem quite cheap (unless I want the one with the built in timer which is quite expansive). So I will put that on my most wanted list.

In the meantime, here are some amazing photos using the technique I was trying to achieve tonight....
http://www.lostamerica.com/index.html

In other news of the evening, I decided to buy the 580EX II flash off Trade me (what don't I buy off Trade me? You cant get anything cheaper elsewhere-my camera was a bargain!). I was thinking about the mkI and also the 480EX II but I thought why not go for the biggest and best? So that will be arriving in a few days. All I need now is my remote, a telephoto lens as my lenses range is short and a new camera bag to fit all of this in! But I'm sure I will find plenty of other gadgets I need...

Friday, March 19, 2010

Night Photography Tonight

Since becoming jobless again in the last couple of days I have had more time to study up on photography techniques again. I want a wide variety of techniques ingrained in my brain before we go to Vanuatu in July so I can get some awesome shots while I'm there. So far I know off by heart how to take auto exposure bracketed shots to create HDR images so mainly do those, otherwise I know AV (smaller the F# blurrier the background), TV (the smaller the number the slower the shutter speed or blurrier/finer the eg. waterfall OR the longer the exposure, or just use my wide angle or macro lens (which still needs work).

My next major task which I would like to become more experienced with is nighttime and low light techniques. Because everyone who has a camera knows that they are the most troublesome shots to get right.
I would like to be able to take good indoor shots without the flash making things look too bright or horrible and good non-flash shots. I'm probably going to get an external flash in the near future which is probably going to be the Canon 580EX. I may as well get it rather than the cheaper 480EX if it's going to give me more range and have more features. I've learnt when it comes to photography that it's probably not always the best to get the cheapest because you will regret it later if it doesn't have the features that you (find out later) you need.

So anyway, today I have been reading up on some articles about outdoor nighttime long exposure photography. Ok its a bit more advanced than what I was originally intending (just learning how to take indoor photos and use a flash more efficiently)but I thought that the photos were amazing and I had to have a go. Also it would be a good technique to add to my knowledge for Vanuatu.

Tonight I will have a go to create one of these types of photos (weather and lighting situation around the neighborhood depending)although it's better to take them around full moon. The next full moon is in about a week and a bit so I'll have a go then as well.
The tips I have learnt and will try are:
1-4 mins are a good amount of time for an exposure.
F5.6 with ISO 100 are good settings to use for this.
Paint an object with light (a torch or flash) to give it light or put a torch inside something. Also use coloured cellophane or filters to create colourful lighting effects.
The smaller the f# the the closer to the subject you need to be (but not too close).
Use Bulb for extended exposures.
Try to get some sky in as this will create nice lighting or star trails.

So I will check back in later with the results of my next experiment...

Saturday, February 13, 2010

Fish eye/Wide angle/Macro

The other day I bought a new lens converter-a wide angle/fisheye + macro. I'm not sure the macro is that great yet as it can only focus on a really really small area (in comparison to macro photos I've seen, some still have quite a bit of area in focus). But the wide angle and fish eye part of it seems good.
Here are some first experiments with it...

Wide angle


Macro (my little colorful cactus)


Supercat through (extreme) fish-eye

Friday, January 29, 2010

Various experiments

Here are various experiments. The first two are HDR and were taken tonight by the beach as the sun set and the others are shots I took in Gisborne (shots of someone walking, light drawing with long exposure,lamp, fireworks, ferns and bottle brush branch with bokeh blur)